1. Move the
coolant reservoir out of the way - not
required but it helps to get it out of the way. I
have heard some are bolted in. If it is, then
don't worry about it.
|
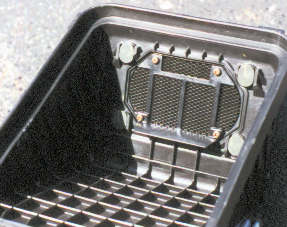
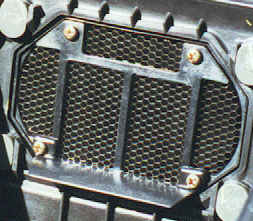
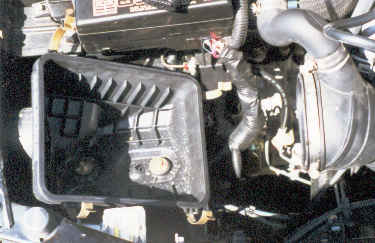
2. Disconnect
MAS electrical harness - The MAS is the
4" square to the right of the large air box.
Be gentle but pull firmly and straight.
|
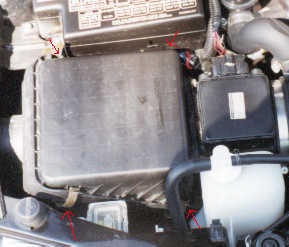
3. Release
stock air box clamps - There are four
marked by the red arrows.
|
4. Loosen the
band clamp holding the MAS to the inlet hose -
it is the silver thing to the right of the MAS.
|
|
|
5.
Remove MAS/Air box combo from turbo inlet
hose - Just set it aside.
|
|
6. Remove lower
Air box section from car - There are
three bolts holding it in, and you will have to
separate it from the snorkel.
|
7. Remove
snorkel - There are one or two bolts
holding it in. Just pull it from the frame after
removing them.
|
|
|
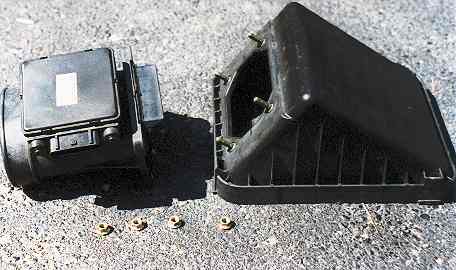
| 8. Separate MAS and Air
box |
 |
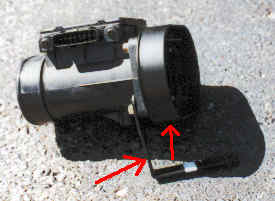
| 9. Attach FIPK mounting
adapter and brackets to MAS - If you have a
300GT FIPK then attach both brackets to the MAS. Only one
will actually match to a bolt hole. . but the other is
used to stabilize the MAS. If you have the newer
Eclipse/Talon K&N then the brackets are different and
you should have instructions on those, or be able to
figure it out. Also don't tighten down the two bolts
holding the clamps until you get the MAS in place. that
way it will all light up right. |
|
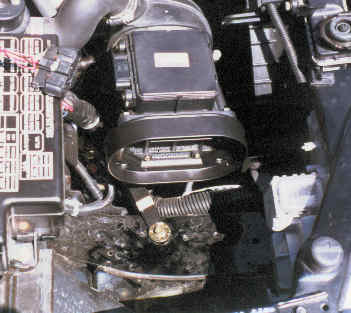
10. Re-attach
MAS to turbo inlet hose and tighten band clamp -
There is no need to do go nuts on the clamp. It
isn't holding pressure and just needs to keep the
MAS from vibrating off.
|
| 11. Attach
bracket to body - Use one of the stock
bolts to attach the one bracket, and put a piece
of rubber under the other to prevent scratching
the frame. At this point you can tighten the two
bolts holding the brackets to the MAS. |
|
|
| 12. Re-attach MAS
electrical harness - Be sure it is secure and
fully inserted. |
|
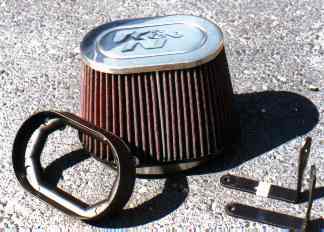
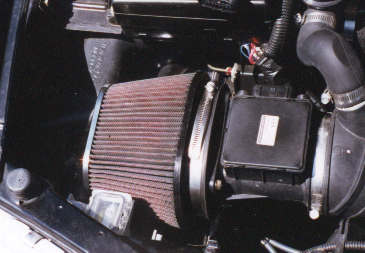
| 13. Install filter and
tighten band clamp (Oil filter if needed) - As
with the MAS. There is no need to get crazy tightening
the clamp. Just tighten it enough to secure it. |
|
14. Replace coolant
reservoir
|
|
| 15. Check all
connections and Start Car - If the car sputters
and stumbles shut it down, connect the MAS electrical
connector (or remove and replace it if you didn't
actually forget to put it in). Next remove the yellow
double fuse in the fuse box for about 30 seconds (since
you are about to get a check engine light). Then restart.
All should be well. |
|